Rectangular Pizza Stone for Grill & Oven: Crisp Crust Guide
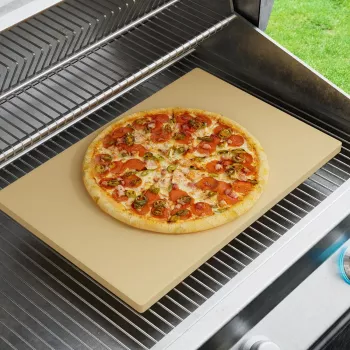
Rectangular Pizza Stone for Grill & Oven: Crisp Crusts, Even Heat, Easy Weeknight Pizzas
A rectangular pizza stone makes it simpler to bake full-size pies, flatbreads, and multiple portions at once—especially when moving between a backyard grill and a kitchen oven. With more usable surface than many round stones, you can launch a big family pizza, slide in a line of breadsticks, or bake two smaller pizzas side by side without wasted corners. Below is a practical guide to choosing the right stone, dialing in preheat and bake times, and keeping the surface performing batch after batch.
Why a Rectangular Stone Works So Well on Grills and in Ovens
- More usable surface area: The rectangular footprint accommodates pizzas, flatbreads, calzones, and “extras” like breadsticks without leaving empty space at the corners.
- Better browning through heat retention: A fully preheated stone stores heat, helping the bottom set quickly so the crust browns before toppings dry out.
- More stable cooking on grill grates: On a grill, a stone can act like a heat buffer—reducing hot-spot scorching from direct flame and smoothing out temperature swings.
- Ideal for meal prep: Bake two smaller pies at once, or par-bake crusts so weeknight dinners become a quick reheat-and-top routine.
What to Look For Before Buying
- Heat tolerance: Choose a stone built for high temperatures typical of pizza baking and grill use.
- Thickness and mass: Heavier stones hold heat longer for consistent browning; thinner stones warm faster but can be less forgiving if heat fluctuates.
- Footprint and clearance: Measure the oven rack and grill lid clearance. Leave a little room around the stone for airflow.
- Surface performance: More porous materials tend to wick moisture for a crisper base; smoother surfaces can be easier to scrape clean.
- Handling plan: Think through how you’ll move food on and off (peel fit, glove clearance, and a safe landing spot for a hot stone).
Quick Comparison: Rectangular Stone vs Other Options
| Option | Best for | Trade-offs |
|---|---|---|
| Rectangular pizza stone | Family-size pies, flatbreads, multiple items at once; grill-to-oven flexibility | Needs thorough preheating; can be heavy; must avoid thermal shock |
| Round pizza stone | Single pizza at a time; compact ovens | Less surface area; corners of oven rack unused |
| Pizza steel | Fastest bottom browning; repeated back-to-back bakes | Heavier; can over-brown bottoms quickly; usually higher cost |
| Perforated pizza pan | Quick weeknight convenience; easy handling | Less heat retention; crust can be softer than stone-baked |
How to Use a Pizza Stone in the Oven (Step-by-Step)
- Start cold: Place the stone on the middle rack while the oven is still cold. (For more top heat, place it one level above the middle.)
- Preheat thoroughly: Once the oven hits temperature, give the stone extra time to heat-saturate—often 20–30 minutes more.
- Prep your peel: Dust with flour, semolina, or cornmeal. Build the pizza quickly so the dough doesn’t absorb the dust and stick.
- Bake to cues, not just time: Look for a browned rim and a speckled, set underside. If the cheese needs more color, finish briefly under the broiler.
- Cool gradually: Turn off the oven and let the stone cool inside with the door cracked before moving it. This helps prevent cracking from sudden temperature change.
How to Use a Pizza Stone on a Grill (Gas or Charcoal)
- Set up for indirect heat: Plan for the stone to cook with reflected heat and convection, not constant direct flame underneath. This typically means burners off under the stone (gas) or coals banked to the sides (charcoal).
- Preheat with the lid closed: A closed-lid preheat stabilizes the stone temperature and reduces hot/cool zones.
- Choose steady heat over maximum flame: A consistent grill temp usually yields better crust texture and more even cheese melt than a “blast furnace” approach.
- Rotate if needed: If your grill runs hotter on one side, rotate the pizza mid-bake. Use a peel carefully to avoid gouging the stone.
- Keep the lid down: Frequent lid lifting dumps top heat and leads to pale toppings.
For general grilling safety practices (placement, clearance, and safe operation), review the National Fire Protection Association guidance here: NFPA — Grilling Safety.
Preheating and Temperature Tips for Better Crust
Care, Cleaning, and Long-Term Performance
Common Problems and Quick Fixes
Serving Ideas Beyond Pizza
Rectangular Pizza Stone for Grill & Oven
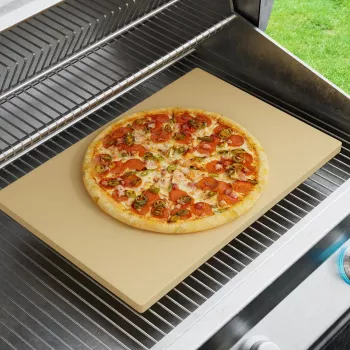
If one surface needs to cover both indoor pizza nights and outdoor grilling, the Rectangular Pizza Stone for Grill & Oven is a practical, flexible option. The rectangular footprint supports larger pies and multi-item bakes without juggling multiple pans—just plan on a thorough preheat routine for the crispest crust.
More In-Stock Finds
- L-Shaped 50-Inch Gaming Desk with CPU Storage & Side Bag for Home Office
- Wooden Montessori Balance Toys set
Food-Safety Note for Pizza Toppings
If you’re adding toppings like sausage or chicken, make sure they reach safe internal temperatures. The USDA provides a clear reference chart here: USDA Food Safety and Inspection Service — Safe Minimum Internal Temperatures.
FAQ
Can a pizza stone go on a grill?
Yes, as long as it’s designed for high heat. Use an indirect-heat setup, preheat gradually with the lid closed, and avoid placing a cold stone directly over intense flames.
Why did my pizza stone crack?
Cracking is most often caused by thermal shock—rapid temperature changes like rinsing a hot stone, placing it on a cold surface, or heating it too aggressively from cold.
Do you need to season a pizza stone?
Most pizza stones don’t require seasoning like cast iron. Performance comes mainly from thorough preheating and regular use, and cosmetic staining is normal.







Leave a comment