Portable Podcast Studio Kit: Live Recording Setup Guide
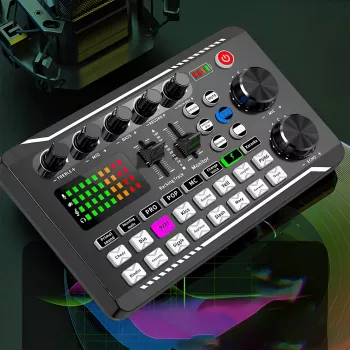
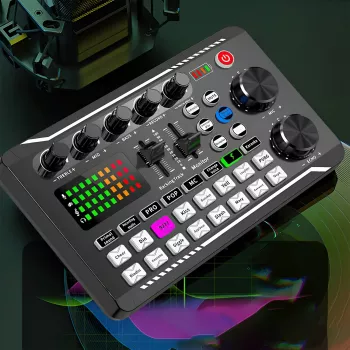
Portable Podcast Studio Kit with Condenser Mic & Sound Mixer for Live Recording
A compact recording bundle can make it much easier to capture clean voice, manage levels, and add simple effects without building a full desk studio. A portable podcast studio kit pairs a condenser mic with a small mixer-style module so you can control gain, monitor in real time, and plug into common devices. Below is what these kits are designed to do, what’s typically included, and how to get clearer sound in normal rooms—especially when you’re recording live.
If you’re shopping for a ready-to-go bundle, see the Portable Podcast Studio Kit with Condenser Mic & Sound Mixer for Live Recording for an all-in-one starting point.
What this kind of kit is built to do
- Combine a condenser microphone and a compact mixer/interface so your voice is captured with more control than a built-in phone or laptop mic.
- Provide hands-on level control for live sessions, voice chats, interviews, and quick recordings.
- Enable simple monitoring so you can hear what’s being recorded and catch issues early (pops, hiss, room echo).
- Stay lightweight for travel, pop-up recording spots, and small rooms where a full desk studio isn’t practical.
What’s included and what each part does
- Condenser microphone: Designed to pick up detail and clarity, which is ideal for spoken voice when placement is consistent.
- Sound mixer module: Handles input gain, output level, headphone monitoring, and often basic effects.
- Cables/adapters (varies by bundle): Connects mic-to-mixer and routes the mixer output to a phone, tablet, or computer.
- Mounting basics (varies by bundle): Helps keep the mic stable and reduces handling noise that can distract in a live recording.
Quick reference: parts and practical use
| Component | Role in recording | Common setup tip |
|---|---|---|
| Condenser mic | Captures voice with detail and presence | Keep 4–8 inches from mouth; angle slightly off-axis to reduce plosives |
| Mixer/sound card | Controls gain, levels, monitoring, and effects | Set gain first, then output; avoid clipping at the input |
| Monitoring (headphone out) | Lets you hear issues like hiss, pops, or room echo | Monitor at a comfortable level to prevent over-driving the output |
| Cables/adapters | Connects to phone/PC and routes audio | Confirm the correct plug standard (TRRS vs TRS) for phones and headsets |
Fast setup for common recording situations
Phone recording
Connect the mixer’s output to your phone input using the correct adapter, then confirm your recording app is using an external mic when supported. If the phone keeps defaulting to its internal mic, unplug/replug the adapter and restart the app before your session.
Laptop/desktop recording
Connect the mixer/interface and select it as the input device in your system sound settings and your recording app. Do a quick test recording, then adjust gain so your loudest speaking stays clean.
Live streaming
Choose the mixer as the audio source in your streaming software and do a short level check before going live. If you’re also playing music or system audio, keep routing simple to avoid feedback loops.
Monitoring
Plug headphones into the mixer so you can catch pops, buzz, or room echo in real time. Monitoring is the fastest way to notice problems before they become a full episode.
Getting cleaner sound from a condenser mic in normal rooms
- Control distance: Move closer instead of turning gain way up. Close placement increases voice level relative to room noise and echo.
- Use mic angle: Aim the mic slightly to the side of your mouth (not straight-on) to soften “p” and “b” bursts.
- Treat the immediate area: Curtains, blankets, a rug, or a closet full of clothing can reduce reflections that make speech sound hollow.
- Reduce vibration noise: Keep the mic off the desk surface when possible and avoid tapping the table or dragging cables.
- Set gain conservatively: If you need more volume, first adjust your distance and speaking position; then raise gain only as needed.
For practical mic technique and handling-noise guidance, resources like NPR Training and Shure’s microphone technique guides offer clear, field-tested fundamentals.
Understanding mixer controls for live recording
If you want a deeper walkthrough of recording levels and safe headroom, the Audacity Manual explains level-setting concepts that apply to most apps and devices.
A simple level-check routine before pressing record
Portability and power considerations
Common issues and quick fixes
Who this kit suits best
Two in-stock picks to build a simple recording corner
- Portable Podcast Studio Kit with Condenser Mic & Sound Mixer for Live Recording — a compact bundle for live voice capture, monitoring, and quick setup.
- L-Shaped 50-Inch Gaming Desk with CPU Storage & Side Bag for Home Office — a space-efficient desk option if you want a dedicated corner for your laptop, notes, and cabling.
FAQ
Will a condenser microphone pick up too much background noise?
Condenser mics are sensitive, but close placement helps a lot: keep the mic about 4–8 inches away and lower gain so your voice is strong without amplifying the room. Adding soft materials nearby (curtains, a blanket, a rug) also reduces echo and perceived background noise.
Can this be used with a phone for live recording or streaming?
Yes, as long as you use the correct adapter/connection type and your app can accept an external mic input. Do a quick test first and confirm TRRS vs. TRS compatibility so the phone detects the mixer properly.
How do you set levels to avoid clipping during a live session?
Talk at your loudest expected volume, raise input gain until the voice is strong, then back it off slightly to keep headroom for laughs or emphasis. Keep your mic distance consistent and listen for distortion in headphones before you go live.







Leave a comment