Build a Mini Garage Workshop Kit with LED Lights
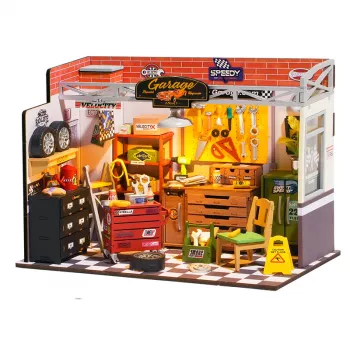
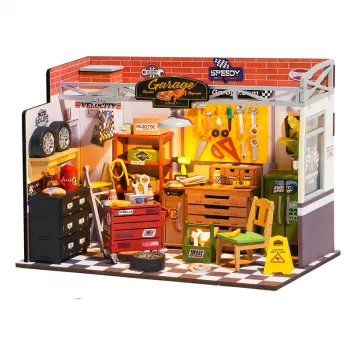
DIY Miniature Garage Workshop Craft Kit with LED Lights
Turn a quiet evening into a hands-on build that ends with a glowing display. Our DIY Miniature Garage Workshop Craft Kit with LED Lights is made for makers who enjoy careful assembly, tiny details, and the satisfaction of switching on lights when the scene is finished. It’s a giftable project, a desk display, and a relaxing craft session all in one—especially if you love workshops, tools, and miniature worlds.
Why this miniature garage workshop is such a satisfying build
If you like projects that feel real (just scaled down), this kit delivers that familiar garage rhythm—workbench zones, storage, and the “everything has a place” look that makes miniature workshops so rewarding.
- A theme that clicks instantly: the layout and objects echo a real garage workspace, so you’re building something recognizable, not abstract.
- LED lighting creates a true finish line: once the lights are on, the whole scene shifts from “project in progress” to “display piece.”
- Patient, step-by-step progress: it’s the kind of build where precision pays off, perfect when you want a screen-free unwind.
- A thoughtful gift choice: it suits hobbyists, DIY fans, and anyone who appreciates tiny details and organized spaces.
What to expect from the building experience
This is a detail-forward miniature build. You’ll get the best experience if you approach it like a series of small wins rather than a race to the end.
- Small components and careful placement: plan to work at a comfortable pace so alignment stays crisp.
- Dry-fit first when possible: test positioning before you commit with adhesive, especially around tight corners and layered parts.
- Handle LED steps early: wire routing and component placement are simplest before you close off narrow sections.
- Short sessions help accuracy: you’ll make fewer mistakes (and enjoy it more) by building in focused blocks of time.
Small parts can be a choking hazard for young children; if you’re building around kids or gifting to a family, it’s smart to keep parts controlled and stored between sessions. The U.S. Consumer Product Safety Commission explains why small components require extra care: CPSC Small Parts guidance.
Tools and setup that make the kit easier
Our team recommends setting yourself up like you would for any precision hobby: clear space, strong light, and a way to control tiny pieces. It takes five minutes to prepare and can save you a lot of backtracking.
Quick setup checklist for smoother assembly
| Setup item | Why it helps | Practical tip |
|---|---|---|
| Desk lamp or bright overhead light | Improves accuracy and reduces fatigue | Aim light from the side to reveal edges and alignment |
| Tweezers | Controls tiny parts without glue smears | Choose fine tips and keep them clean |
| Small parts tray | Prevents pieces from disappearing | Sort by step or by type before starting |
| Precision knife + cutting mat | Cleaner trims and safer cuts | Replace blades when they drag |
| Glue options (fast-grab + clear-drying) | Better control on different materials | Use a toothpick to apply tiny amounts |
One underrated upgrade: give yourself a stable build surface with elbow room. If you’re setting up a dedicated corner for crafts, our L-Shaped 50-Inch Gaming Desk with CPU Storage & Side Bag for Home Office offers a spacious layout that makes sorting, gluing, and staging parts feel less cramped.
Getting the LED lights right (without frustration)
The LED step is usually straightforward, but it rewards a little planning. The best time to think about lighting is before the build becomes “closed up.”
- Map the lighting path early: confirm where the LED component sits and where the wiring needs to run before final assembly.
- Avoid pinched wires: leave gentle slack at corners and keep wiring away from tight-fitting joints.
- Test as you go: a quick check before you seal a section can prevent time-consuming rework.
- Use low-tack tape temporarily: hold wires in place while you confirm fit and routing.
If you like learning the basics behind LEDs—why they run cool and sip energy—ENERGY STAR has a helpful overview of LED lighting fundamentals: ENERGY STAR lighting guidance.
Display ideas once it’s finished
After the last piece is placed and the lights are on, you’ll have a display that adds character without needing a lot of space.
Who this kit is best for
Product details at a glance
- Product: DIY Miniature Garage Workshop Craft Kit with LED Lights
- Price: $34.51 USD
- Availability: In stock
- What you’re getting: a complete craft-and-display concept—build a miniature garage workshop scene and finish it with working LED lighting.
More hands-on picks from our team
- Wooden Montessori Balance Toys set (a simple, tactile build-and-balance activity that’s great for table-time)
- 1:20 Scale RC Dump Truck Excavator with Remote Control for Kids (for big construction energy after your small-scale build is complete)
FAQ
How long does it take to complete a DIY miniature garage workshop kit?
Most builders finish in several hours to a couple of evenings, depending on your pace and how comfortable you are with small parts. Splitting it into shorter sessions helps you stay accurate and enjoy the details instead of rushing.
Are batteries included for the LED lights?
Battery and power details can vary by kit version, so confirm the power requirements before you start assembling. Regardless, it’s best to test the LED components early so you can plan the lighting steps smoothly.
Is this kit suitable for kids?
This type of miniature kit includes small parts and may involve tools or adhesives, so it’s best for patient teens and adults. Younger kids can participate with close adult supervision, especially around cutting, gluing, and tiny components.







Leave a comment