DIY Miniature Kitchen Kit: Tools, Steps & Pro Tips
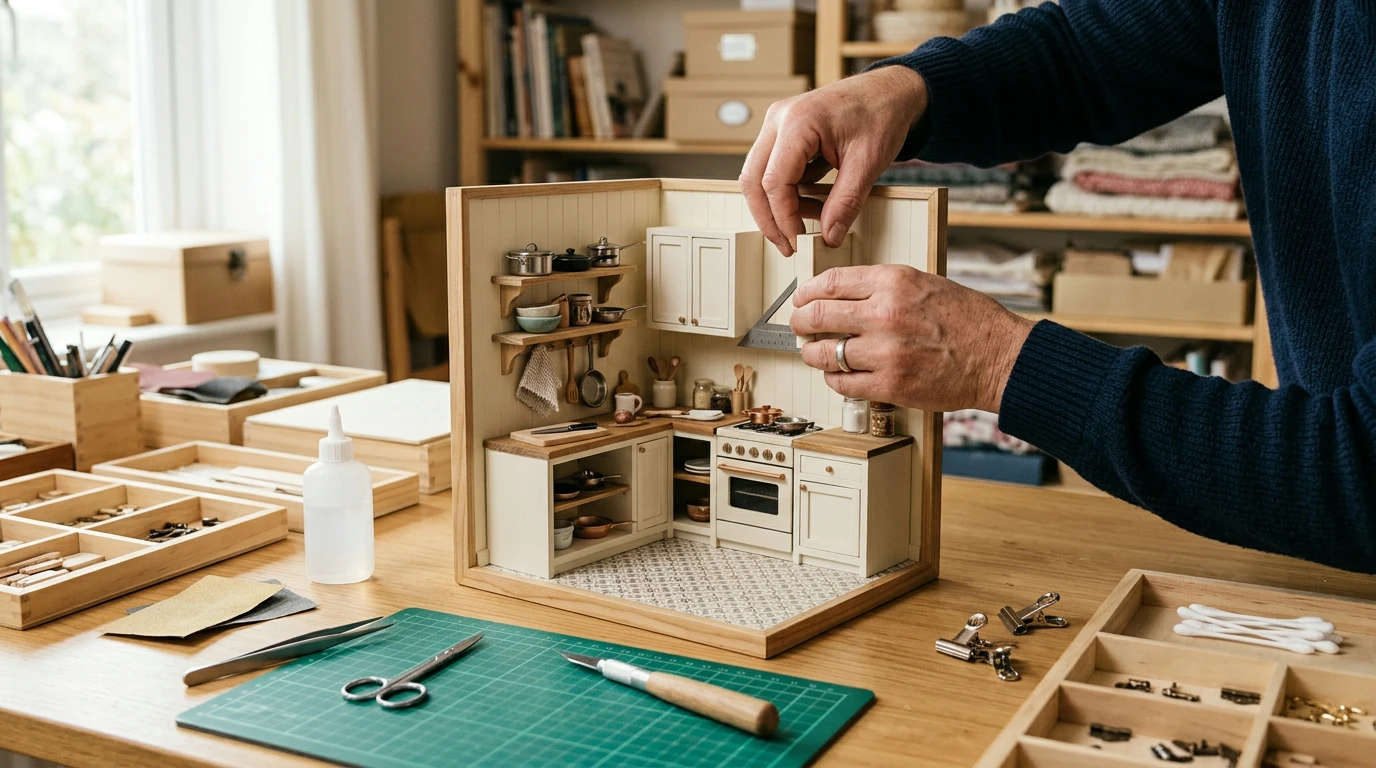
DIY Miniature Kitchen Building Kit: A Cozy Mini Scene Built by Hand
A miniature kitchen kit turns a small box of parts into a detailed, display-worthy room—complete with cabinetry, cookware, and warm “lived-in” touches. With the right setup and a calm build order, it’s the kind of project that feels relaxing while still delivering a high-impact finished piece you’ll want to keep on display.
Below is a practical guide to what typically comes in the kit, how to assemble it smoothly, which tools make the biggest difference, and how to stay organized from the first dry-fit to the final accessory placement.
What Makes a Miniature Kitchen Kit Special
- Room-in-a-box format: Walls, a floor, furniture pieces, and decor assemble into a complete mini scene.
- A satisfying mix of tasks: Folding, gluing, small paint touch-ups, and arranging tiny accessories.
- Display appeal: A finished kitchen scene looks great on a shelf, desk, or alongside other miniature rooms.
- Skill-building: Encourages patience, sequencing, and fine-motor control—great for hobbyists and thoughtful gifting.
What’s Usually Inside the Box
Most miniature kitchen kits include a blend of structural pieces and small “storytelling” details. Some sets are more paper-craft heavy, while others lean toward wood furniture components with paper textures layered on top.
- Pre-cut materials: Wood sheets, paperboard, printed paper, and sometimes fabric for curtains or towels.
- Mini accessories: Food items, jars, utensils, cookware, and countertop clutter that makes the room feel real.
- Structural components: Cabinets, counters, shelves, a table, and storage units; light sanding may help achieve flush seams.
- Instructions: A booklet or diagrams; many kits include numbered bags or labels to reduce confusion.
- Optional lighting: If LEDs and wiring are included, it’s best to plan wire routes early—before walls are sealed.
Common components and how they’re used
| Component | Purpose | Assembly tip |
|---|---|---|
| Wall & floor panels | Form the room shell and surfaces | Dry-fit first so corners align before glue |
| Cabinets & counters | Main furniture and work surfaces | Use a small square or book edge to keep angles true |
| Mini decor (jars, pans, plants) | Adds realism and scale cues | Place after major glue points cure to avoid bumps |
| Paper prints (labels, tiles) | Creates textures like backsplash and packaging | Seal lightly with clear glue or varnish to reduce lifting |
| Fabric pieces | Curtains, towels, soft accents | Use tiny dots of glue; avoid soaking fabric |
Tools and Supplies That Make Assembly Easier
Most frustrations come from rushed alignment, excess glue, or pieces that shift while curing. A few simple tools prevent all three.
- Adhesives: Tacky glue for porous parts (wood/fabric), clear-drying craft glue for paper, and a tiny amount of super glue for quick bonds (use sparingly).
- Precision tools: Tweezers, small scissors, a craft knife, and a cutting mat for clean trims.
- Finishing helpers: Fine sandpaper, a small file, cotton swabs for glue cleanup, and a soft brush for dusting.
- Clamping and alignment: Mini clips, rubber bands, and small weights (coins or a book) to hold parts steady.
- Lighting support (if included): Painter’s tape or small clips to manage wire routing before panels are permanently attached.
Step-by-Step Build Plan (Without the Frustration)
Instead of building “top to bottom” like a real kitchen renovation, miniature kits go smoother when you treat them like modular sub-assemblies that only get married together once everything fits.
Troubleshooting: Quick Fixes for Common Snags
Making It Look Like a Real Kitchen
Who It’s Best For (and When to Gift It)
For toy safety and small-parts awareness, it’s worth reviewing the CPSC small parts regulations (16 CFR Part 1501) and the ASTM F963 toy safety standard overview.
Product Spotlight: DIY Miniature Kitchen Building Kit
If you’re ready to build a cozy room scene with furniture and decorative details, the DIY Miniature Kitchen Building Kit is a solid pick for hands-on crafting and display. A reliable approach is to build the large structures first (walls and counters), then place accessories only after everything cures for a cleaner finish.
To make the experience smoother, pair the kit with a simple parts organizer tray. For a small, screen-free add-on gift, consider the Wooden Montessori Balance Toys set. And if you want a dedicated workspace with room to spread out parts, an ample craft surface like the L-Shaped 50-Inch Gaming Desk with CPU Storage & Side Bag for Home Office can help keep tiny pieces from getting lost mid-build.
At-a-glance details
| Item | Price | Availability |
|---|---|---|
| DIY Miniature Kitchen Building Kit | 43.51 USD | In stock |
FAQ
How long does it take to complete a miniature kitchen kit?
Many builders finish in about 6–12 hours of hands-on work, often spread over a weekend. Drying and curing time can add extra hours, especially if you’re assembling multiple furniture modules and paper surfaces.
What glue works best for miniature furniture and paper details?
Clear-drying craft glue or tacky glue works well for most paper and wood parts because it offers a bit of repositioning time. Super glue bonds fast, but it can frost and is harder to correct if a piece lands slightly off.
Is this type of kit suitable for kids?
Because miniature kits typically include small parts and sharp-edged tools may be used, they’re better suited to teens and adults or older kids with close supervision. Always follow the kit’s age guidance and keep tiny components out of reach of younger children.








Leave a comment