Professional 4-in-1 Blow Dryer Brush: Smooth Blowouts
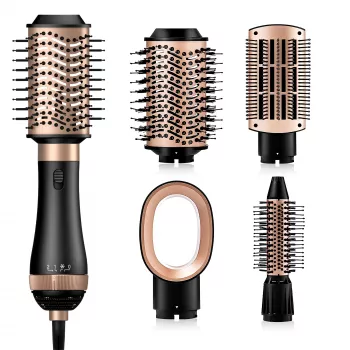
A blow dryer brush can streamline daily styling by combining airflow and a brush shape to dry and smooth at the same time. This guide covers what to expect from a professional-grade 4-in-1 tool, how to use it for different finishes, what features matter for comfort and hair health, and simple care tips to keep results consistent.
What a 4-in-1 blow dryer brush does
A 4-in-1 blow dryer brush is built to handle multiple steps in one pass: drying, detangling, smoothing, and shaping. Instead of aiming a dryer with one hand while maneuvering a separate round brush with the other, you guide hair into place while warm airflow helps moisture evaporate.
- Combines drying and brushing so hair can be guided into shape while moisture evaporates.
- Helps reduce the need to juggle a separate dryer and round brush, especially for quick at-home blowouts.
- Designed to create smoother lengths, lift at the roots, and softly curved ends depending on technique.
- Best results typically come from towel-dried (not dripping wet) hair and working in manageable sections.
For the most consistent finish, think of it as a shaping tool rather than a “dry-from-soaking” tool. Starting on hair that’s already mostly dry typically improves shine and reduces unnecessary heat exposure.
Who it works best for (and when it may not)
Most hair types can use a dryer brush, but the technique and settings should match your texture, density, and overall hair condition.
- Fine to medium hair: often benefits from added volume and faster styling with less effort.
- Thick hair: can still work well, but typically needs smaller sections and more time per section.
- Curly or coily hair: can help stretch and smooth; for tighter patterns, pre-drying and tension control are important to limit frizz.
- Very damaged or highly porous hair: may need lower heat settings and added heat protectant to avoid dryness.
- Very short hair: may be harder to wrap around the brush; a smaller barrel tool can be easier for pixie-length styles.
If you’re focused on scalp and strand health, it’s worth following basic hair-care guidance from reputable sources like the American Academy of Dermatology Association and being mindful about product choices and labeling through resources like the U.S. Food & Drug Administration.
Features that make a blow dryer brush feel “professional”
Two dryer brushes can look similar, but performance and comfort come down to a few key details. A professional feel usually means the tool is easier to control, more consistent in heat delivery, and less tiring to use.
- Heat and airflow control: multiple settings make it easier to match hair type and avoid overheating.
- Even heat distribution: helps reduce hot spots that can cause dryness or uneven results.
- Ergonomics: balanced weight and a comfortable handle reduce wrist fatigue during longer styling sessions.
- Bristle design: a mix of detangling and smoothing contact points can help reduce snagging while maintaining tension.
- Cord length and swivel: improves mobility and reduces tangling while styling.
Comfort matters more than it seems: a tool that’s easy to hold and maneuver encourages slower, controlled passes—the kind that typically create smoother results with fewer repeats.
Quick-start routine for a smooth blowout
For a polished blowout at home, the routine is simple: prep well, remove most moisture first, then use the brush mainly for shaping and smoothing.
- Prep: towel-dry, detangle gently, and apply a heat protectant through mid-lengths and ends.
- Pre-dry: rough-dry to about 70–80% dry so the brush can focus on shaping rather than removing all moisture.
- Section: divide hair into 4–6 sections (more for thick hair) for controlled tension and consistent results.
- Technique: place the brush near roots, lift slightly for volume, then glide slowly down the section while rotating to curve ends.
- Finish: use a cool setting (or brief cool-down pass) to help set the shape and add shine.
Looks to try: volume, sleek finish, and soft waves
| Goal | Section size | Brush movement | Finish |
|---|---|---|---|
| Extra volume | Small to medium | Lift at roots, slight rotation | Cool pass at crown |
| Sleek lengths | Small | Slow glide, minimal rotation | Light serum on ends |
| Curved ends | Medium | Rotate at last inches | Cool pass on ends |
| Soft waves | Small | Alternate rotation direction | Texture spray (optional) |
Heat settings and hair health basics
Care, cleaning, and safety
Product options available now
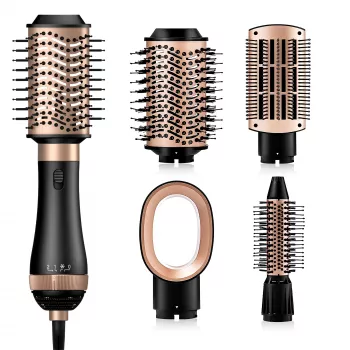
If the goal is a single-tool approach for drying and styling with everyday convenience, the Professional 4 In 1 Blow Dryer Brush is a practical pick for faster morning routines, quick touch-ups before going out, or smoothing and shaping after wash day. Pair it with a heat protectant and a light finishing product for a polished look without heavy buildup.
- L-Shaped 50-Inch Gaming Desk with CPU Storage & Side Bag for Home Office (a roomy surface that can double as a vanity-style station with a mirror and organizers).
- Wooden Montessori Balance Toys set (a quiet, screen-free option to keep little hands busy during a quick style session).
| Item | Price | Availability |
|---|---|---|
| Professional 4 In 1 Blow Dryer Brush | 41.82 USD | In stock |
FAQ
Can a blow dryer brush be used on wet hair?
It works best on towel-dried hair. Pre-drying to about 70–80% helps reduce heat exposure and usually improves smoothness and shine.
How do you get more volume at the roots with a dryer brush?
Use smaller sections, place the brush close to the scalp, lift upward with tension, pause briefly, then glide down. A short cool pass at the root area can help the lift last longer.
Why does hair look frizzy after using a blow dryer brush?
Common causes include sections that are too large, moving too fast, using too much heat, or starting on very wet hair. Try thinner sections, slower glides, a lower setting, and consistent heat protectant for a smoother finish.








Leave a comment