3L Vertical Sausage Stuffer: Tubes, Tips & Cleaner Links
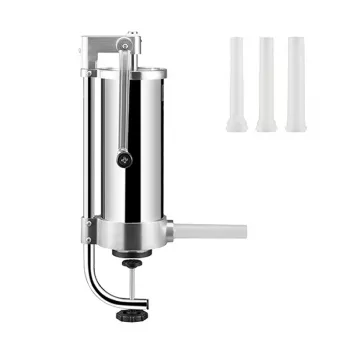
Vertical Sausage Stuffer with 3L Capacity & Stuffing Tubes: Practical Home Sausage Making
A vertical sausage stuffer streamlines the most fiddly part of sausage making—getting a consistent fill without excessive air pockets, casing blowouts, or messy transfers. With a 3L canister and multiple stuffing tubes, this style suits small batches for weeknight meal prep, weekend smoking sessions, and experimenting with different casing sizes. For food-safety basics when working with raw meat, reference the USDA FSIS guidance on sausages and food safety and keep a reliable thermometer handy using USDA thermometer tips.
What a Vertical Sausage Stuffer Does (and Why Vertical Matters)
A vertical stuffer is built around a simple canister-and-plunger system: you load seasoned meat into the cylinder, then a plunger presses the mixture through a stuffing tube and into the casing. Instead of pushing meat through a grinder attachment (which can warm the mixture and smear fat), a dedicated stuffer focuses on steady, controlled pressure.
The vertical layout helps in practical ways. It uses a stable footprint on the counter, loading is gravity-friendly (meat settles downward into the cylinder), and the tube points forward for easier casing alignment. That setup is especially helpful for coarser grinds, fresh sausage links, snack sticks, and any batch where consistent portioning matters.
Compared with improvised methods—funnels, piping bags, or grinder stuffing attachments—a vertical stuffer typically offers faster workflow, better control, and less mess. The goal is fewer pauses, fewer air pockets, and less handling so the mixture stays cold and cohesive.
Capacity and Batch Planning with a 3L Canister
A 3L canister hits a sweet spot for home kitchens: enough volume for small-to-medium batches without constant refilling, while still being easy to chill and manage. It’s well-suited to everyday runs like breakfast sausage patties (stuff then portion), Italian links for pasta night, bratwurst for the grill, or split batches where you test different spice blends in the same session.
Fewer reloads can also improve texture. Every extra transfer warms the mixture and increases the chance of fat smearing—especially if you’re stuffing in a warm kitchen. A 3L cylinder helps you keep the process moving so the meat stays colder and is handled less.
For smoother staging, plan your station: set up casings, a sheet pan for finished links, and space in the fridge to chill sausages between steps (especially before twisting or smoking).
| Task | What to prepare | Why it helps |
|---|---|---|
| Pre-chill equipment | Canister, plunger, bowl, and tubes in fridge/freezer briefly | Colder tools reduce fat smearing and keep texture firmer |
| Portion the mix | Divide meat mixture into canister-sized loads | Speeds up reloading and keeps batches consistent |
| Set up the station | Sheet pan for links, damp towel under the base, water for rinsing hands | Cuts mess and improves control while cranking/pressing |
| Plan casing length | Pre-rinse and soak casings; flush water through | Reduces tears and makes sliding onto the tube easier |
Stuffing Tubes: Choosing the Right Size for Each Sausage Style
Multiple stuffing tubes aren’t just a nice add-on—they help match tube diameter to casing type so the filling flows without excessive backpressure. When the tube is too small for the casing (or the grind), you tend to overwork the mixture and risk blowouts. When the tube is too large, it can be awkward to load and harder to keep the casing feeding smoothly.
As a rule of thumb: smaller tubes are better for snack sticks and narrower casings (like sheep casings), while larger tubes work well for standard hog casings and thicker sausages. The right tube size helps maintain a steady pace, which reduces air pockets and makes link twisting more uniform.
A practical trick: lightly wet (or very lightly oil) the tube and the first few inches of casing so it slides on easily and feeds without snagging.
Features That Improve Control and Reduce Air Pockets
Cleaning and Care for Food-Contact Tools
Product Snapshot: Vertical Sausage Stuffer with 3L Capacity & 3 Stuffing Tubes
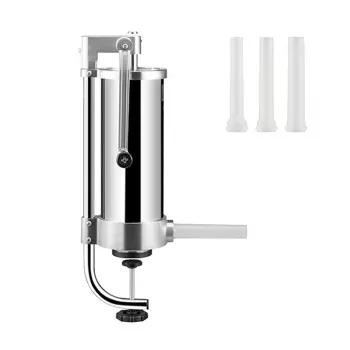
If the goal is controlled filling without turning sausage night into a cleanup marathon, a dedicated stuffer is a practical upgrade. The Vertical Sausage Stuffer with 3L Capacity & 3 Stuffing Tubes is designed for home sausage makers who want consistent results across different casing sizes. The 3L capacity supports frequent small batches with fewer refills, and the included tubes help match common sausage styles.
For a comfortable prep setup—especially if you like to keep ingredients, trays, and tools organized—having a dedicated workspace helps. A spacious corner workstation like the L-Shaped 50-Inch Gaming Desk with CPU Storage & Side Bag for Home Office can also function as a general-purpose home prep and project station when you need extra surface area for staging (away from splashes and with easy wipe-down access).
| Item | Detail |
|---|---|
| Product | Vertical Sausage Stuffer with 3L Capacity & 3 Stuffing Tubes |
| Capacity | 3L |
| Included tubes | 3 stuffing tubes |
| Availability | In stock |
| Price | 77.51 USD |
Common Mistakes and Simple Fixes
FAQ
Is a 3L vertical stuffer enough for home sausage making?
For most home cooks, 3L is a comfortable small-batch capacity that reduces refills while staying easy to manage and chill. A larger stuffer can be preferable if you regularly make big batches for gatherings or bulk freezing.
How do stuffing tube sizes affect the casing and the final texture?
Matching tube diameter to the casing improves flow, reduces backpressure, and helps prevent blowouts. It also supports a steadier fill rate, which typically means fewer air pockets and more even texture.
How should a sausage stuffer be cleaned after using raw meat?
Disassemble it right away, wash with hot soapy water, rinse thoroughly, and allow all parts to fully air-dry before storing. Keep raw-meat tools and surfaces separated from ready-to-eat foods during the session.







Leave a comment